
Authentication
In this article:

Introduction
In order to interact with the shops GraphQL API, you must provide appropriate credentials for authentication with each HTTP request. The way to obtain and provide these credentials is detailed in the following sections.
Managing OAuth clients
In order to generate authentication tokens, you must first create an OAuth client . This is done in the shop administration under Settings > API:
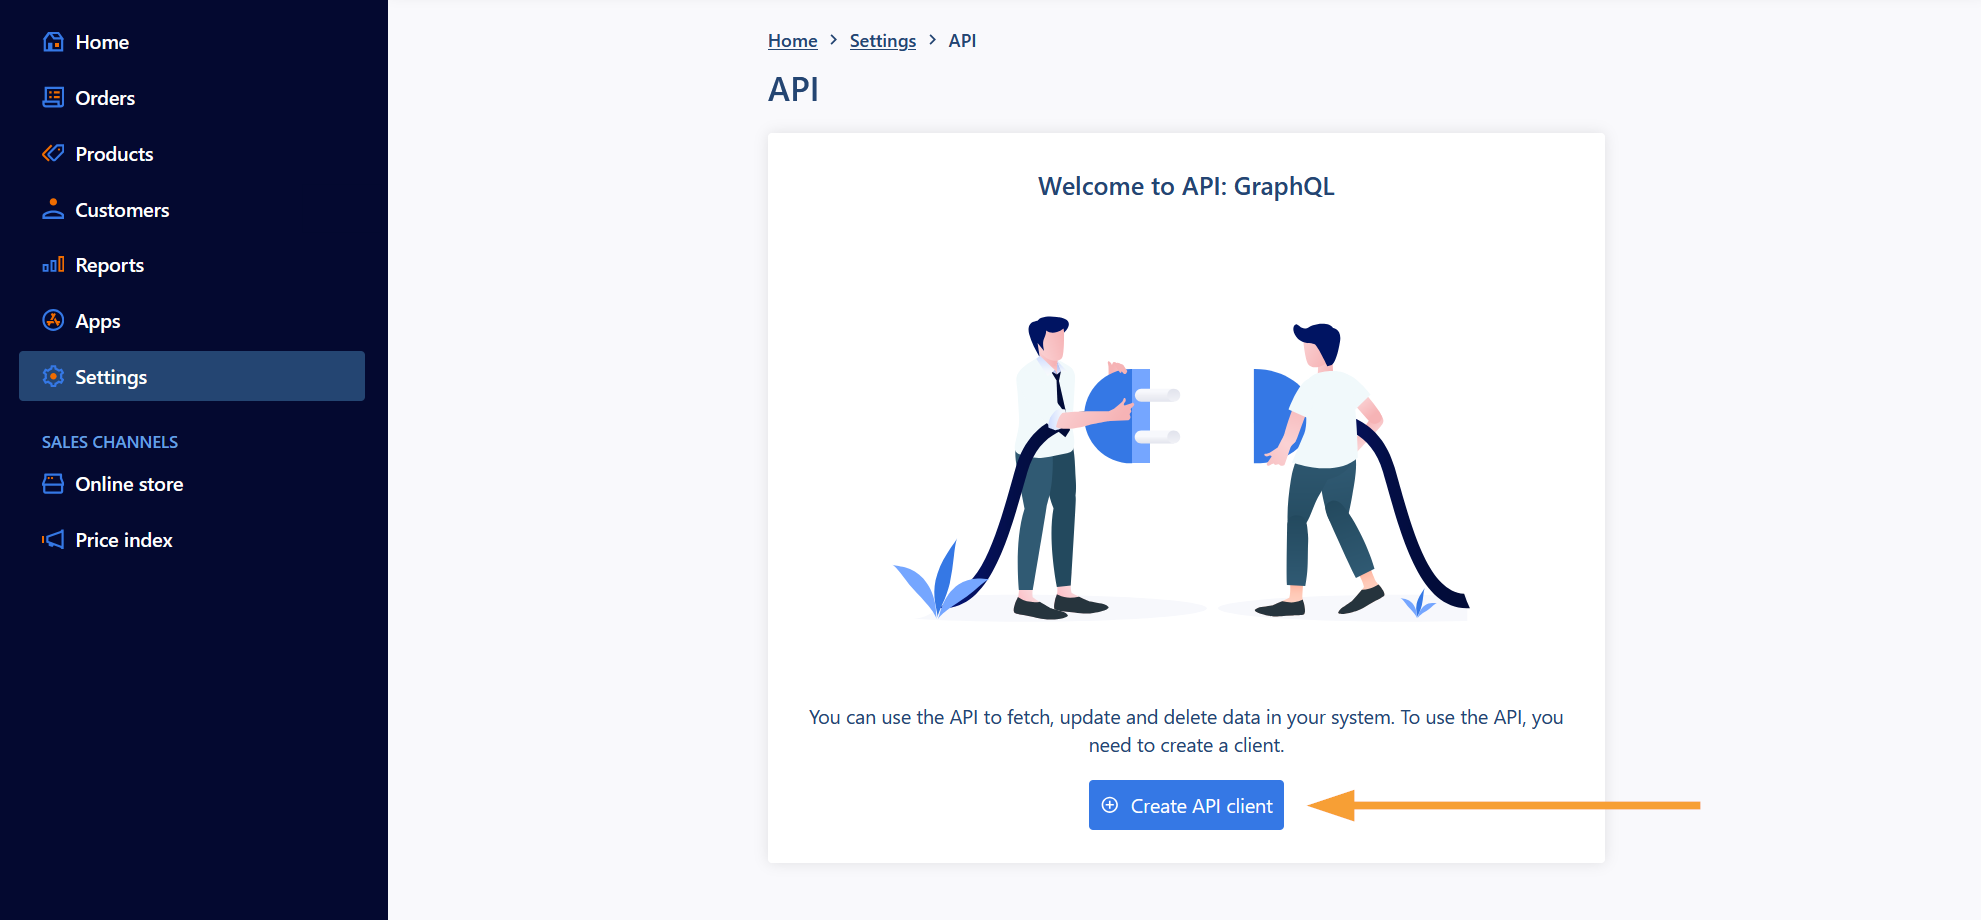
Click the button "Create API client".
Please note: Access tokens are valid for 24 hours.
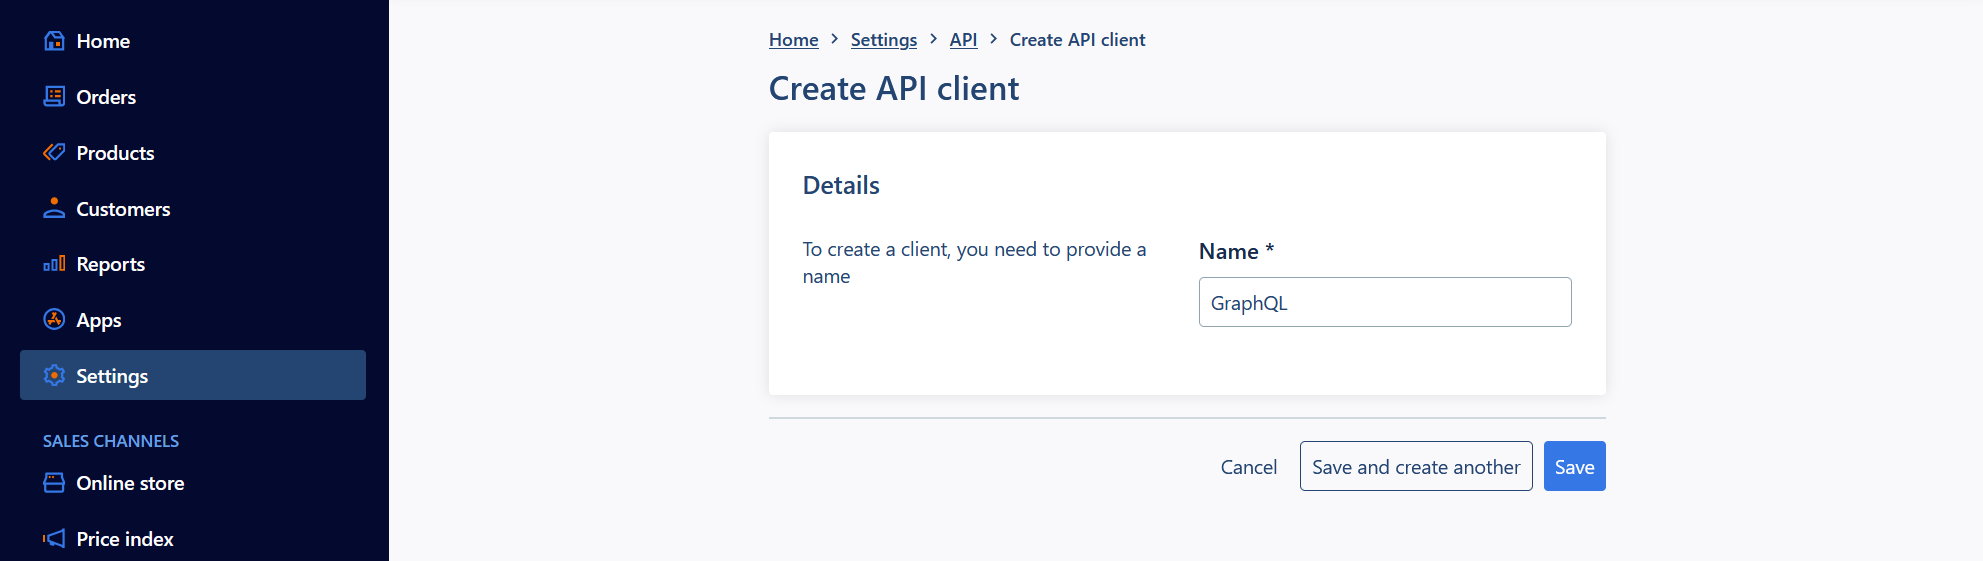
Type the desired name and click Save:
The new client will now be visible in the the API overview:
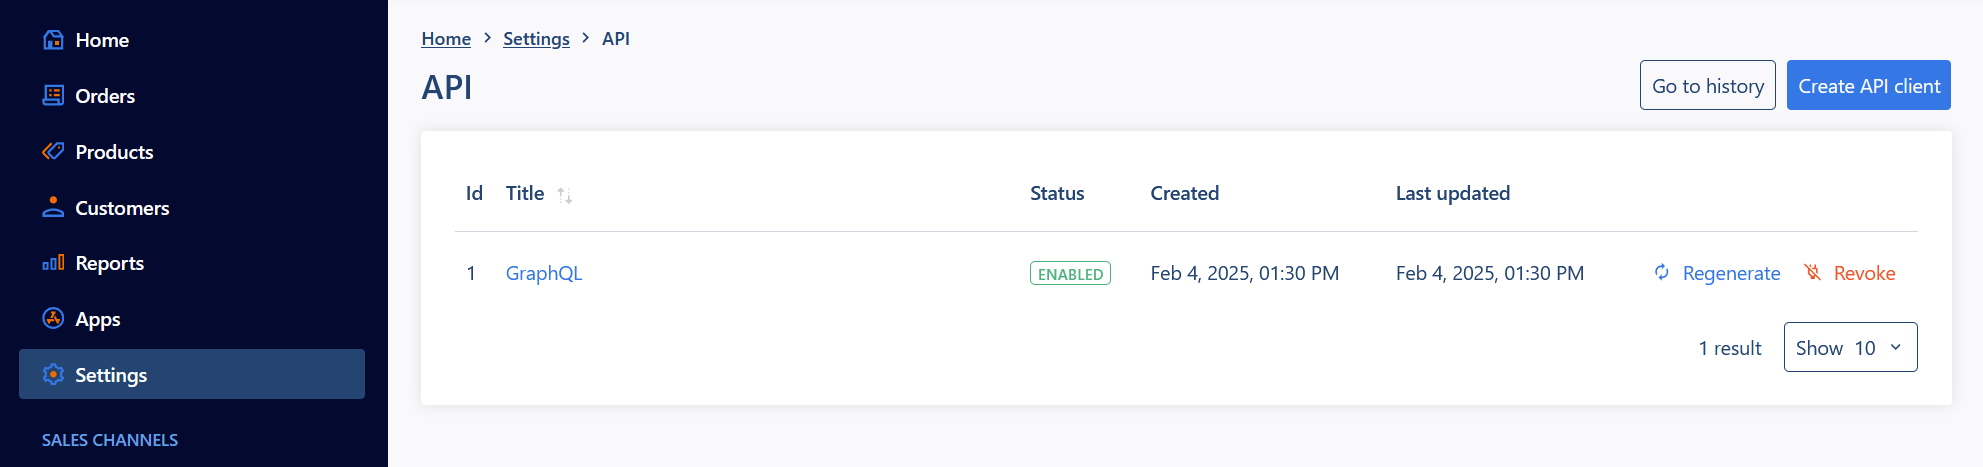
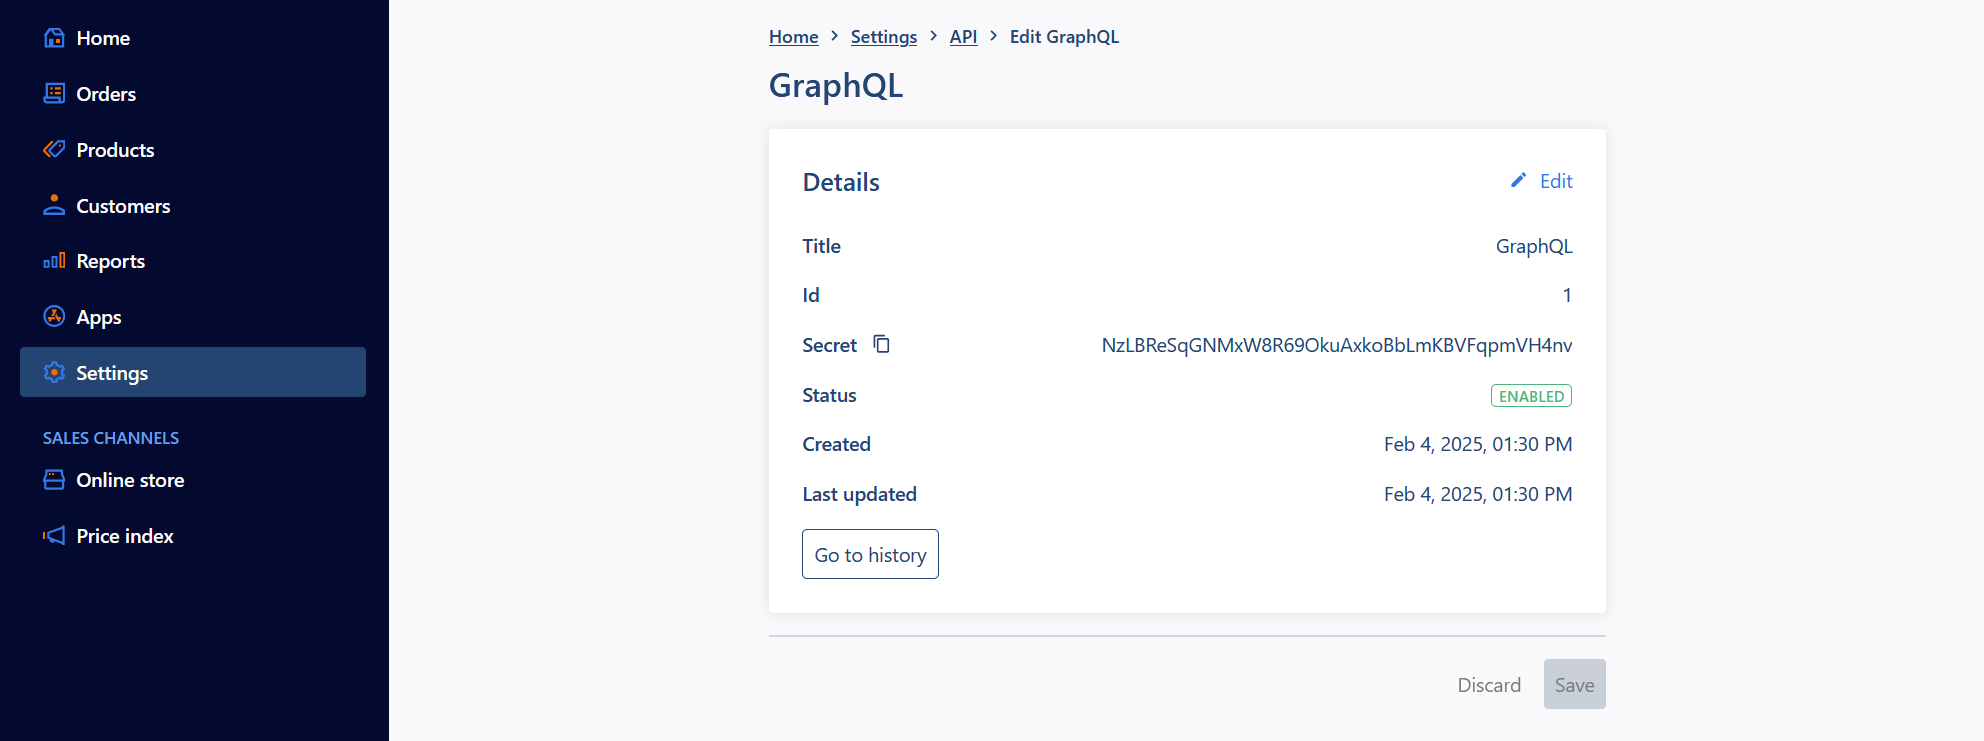
- Click the clients name to edit it.
- Click Regenerate to generate a new secret (client kode).
- Click Revoke to deactivate the client.
Generating authentication tokens
In order to generate an authentication token, make an HTTP POST request with the Client ID and Client code (Secret):
   curl --request POST \
        --data 'grant_type=client_credentials&client_id=[client-id]&client_secret=[client-secret]&scope=' \
        https://[tenant].mywebshop.io/auth/oauth/token
Making authenticated requests
After the client has obtained an API access token, it can make authenticated requests to the GraphQL API. These requests are accompanied with a header Authorization: Bearer {access_token} where {access_token} is replaced with the generated authentication token.
Please note: Access tokens are valid for 24 hours.
An example request using the authentication token:
   curl -H 'Accept: application/json' \
        -H 'Content-Type: application/json' \
        -H "Authorization: Bearer [token]" \
        --data-binary '{"query":"query{orders{data{id}}}","variables":{},"operationName":null}' \
        https://[tenant].mywebshop.io/api/graphql
Making authenticated requests with Postman
Instead of using curl to make requests, you can also use Postman, which allows you to work in a graphical user interface where you can save your requests for future use..
When you use Postman with the shop's API, you automatically get access to a graphical overview of all available resources, which is also a good opportunity to search and clarify which topics you can address. And depending on which endpoint you use, you can access both the Public API (published functionality) and the Experimental API (functionality that is still under development).
Access token link and endpoints
You need the following URLs to authorize and call the shop's API. In the guide below, we show you where and when to use the URLs.
- OAuth2 access token URL:
https://shopXXXXX.mywebshop.io/auth/oauth/token - Public API endpoint:
https://shopXXXXX.mywebshop.io/api/graphql - Experimental API endpoint:
https://shopXXXXX.mywebshop.io/api/graphql/experimental
Note: Insert your own shop number where it says shopXXXXX in the examples. You can download Postman here.
How to do it
Before we can make authorized calls to the shop's API, we need approval in the form of a token - a key that allows us to be identified as users of the API. So the first thing we do in Postman is ask the shop's API to approve us with the ID and Secret found on the API client in the shop under Settings > API. We can then use our token, which Postman automatically saves on the request we are working with.
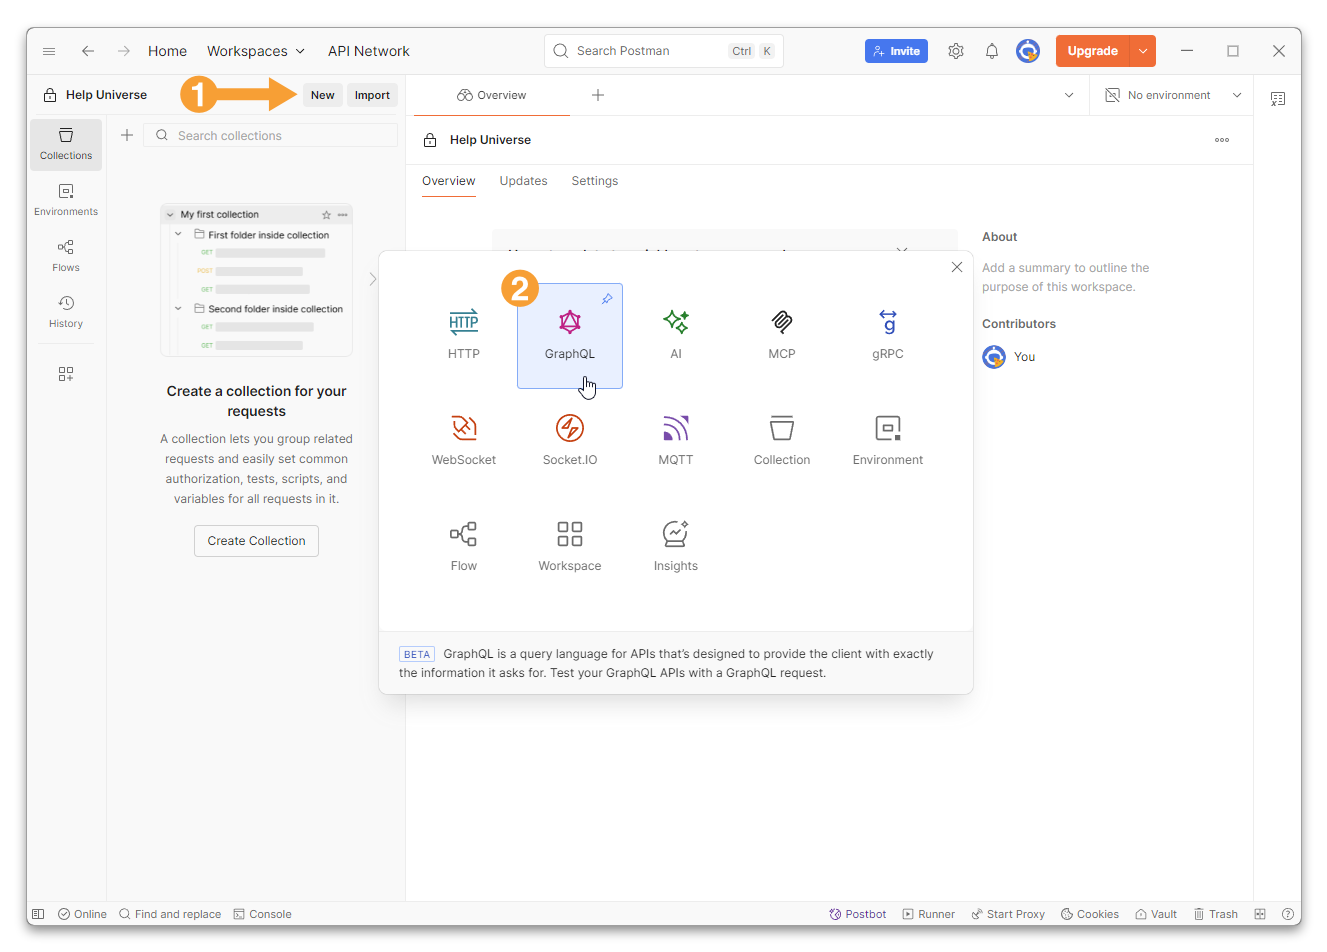
- Open Postman and click New to start a new query. Select GraphQL in the dialog box:
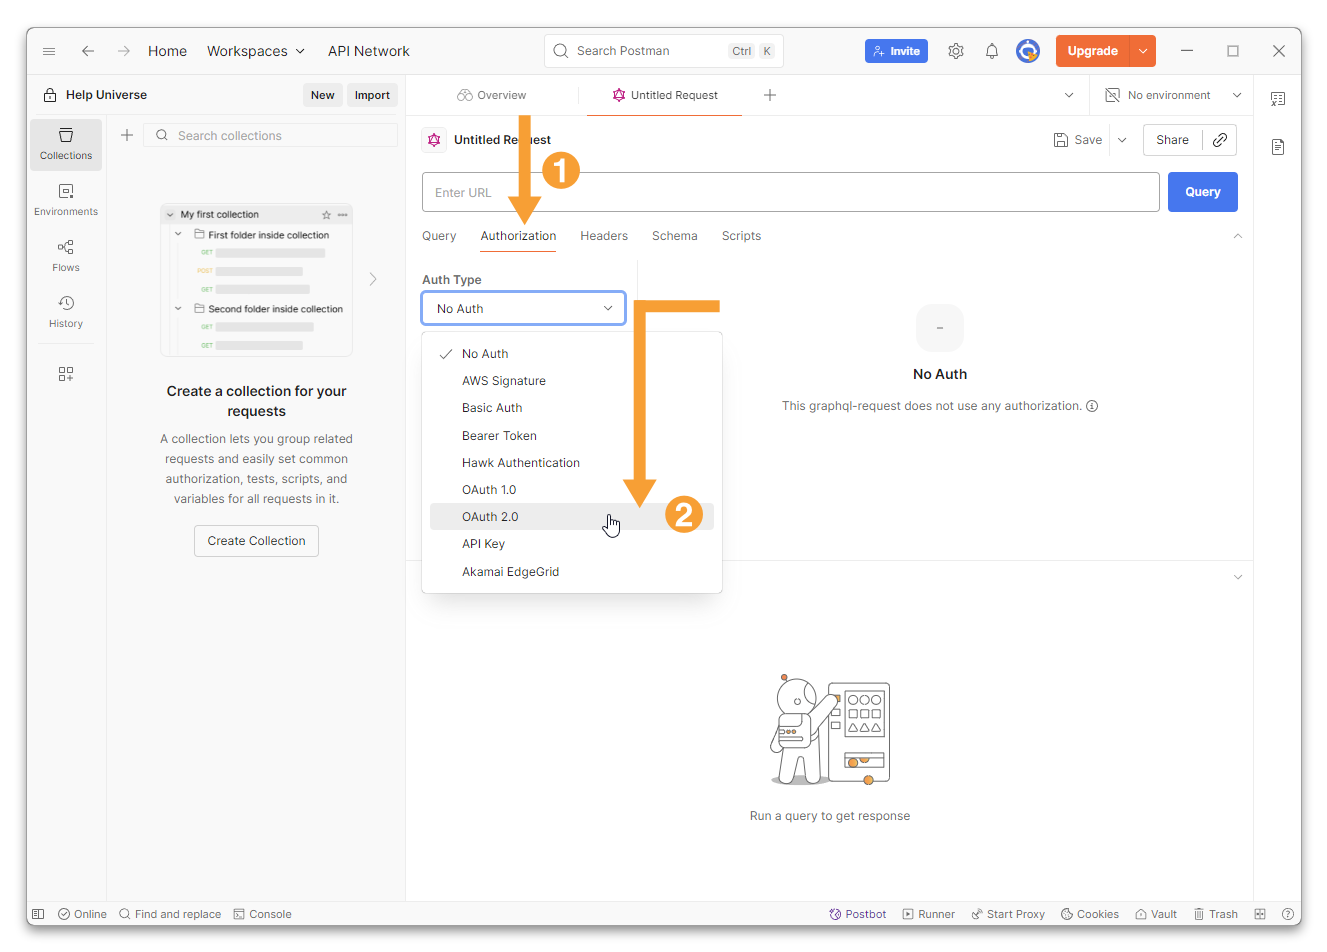
- Click on the Authorization tab and select OAuth 2.0 from the dropdown list:
- Scroll down the section on the right until you reach Configure New Token (you can ignore the content of the fields above):
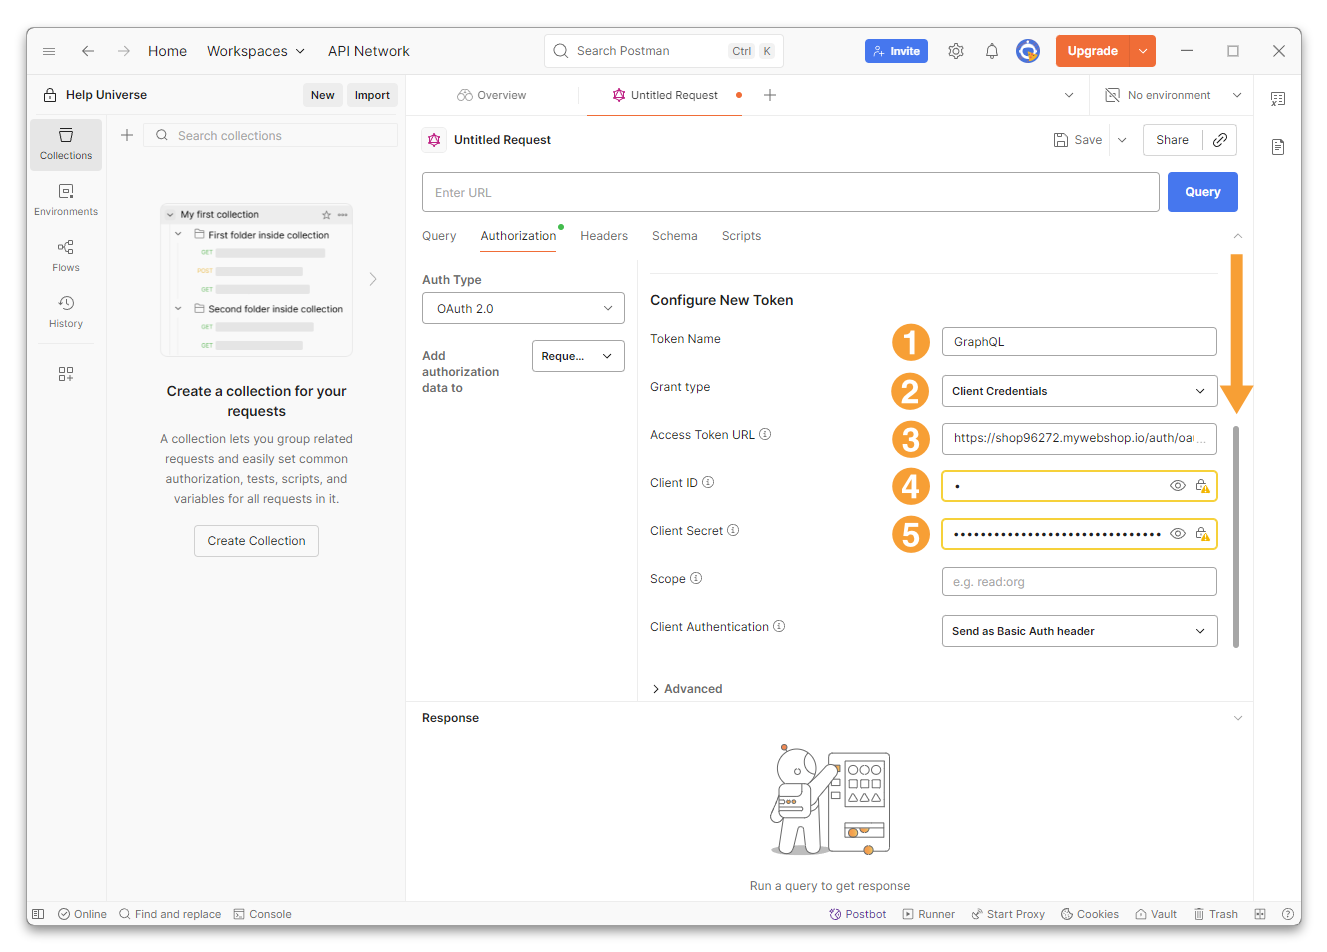
- Token Name: Enter a meaningful name. For example, you can use the same name you used for the API client in the shop.
- Grant type: Select Client Credentials, as we are authorizing our connection.
- Access Token URL: Insert your authorization link to the shop (see the example further up on this page).
- Client ID: Here you must enter the Client ID found on your API client in the shop.
- Client Secret: Enter your Secret, which can be found on your API client in the shop..
- You can ignore the remaining fields.
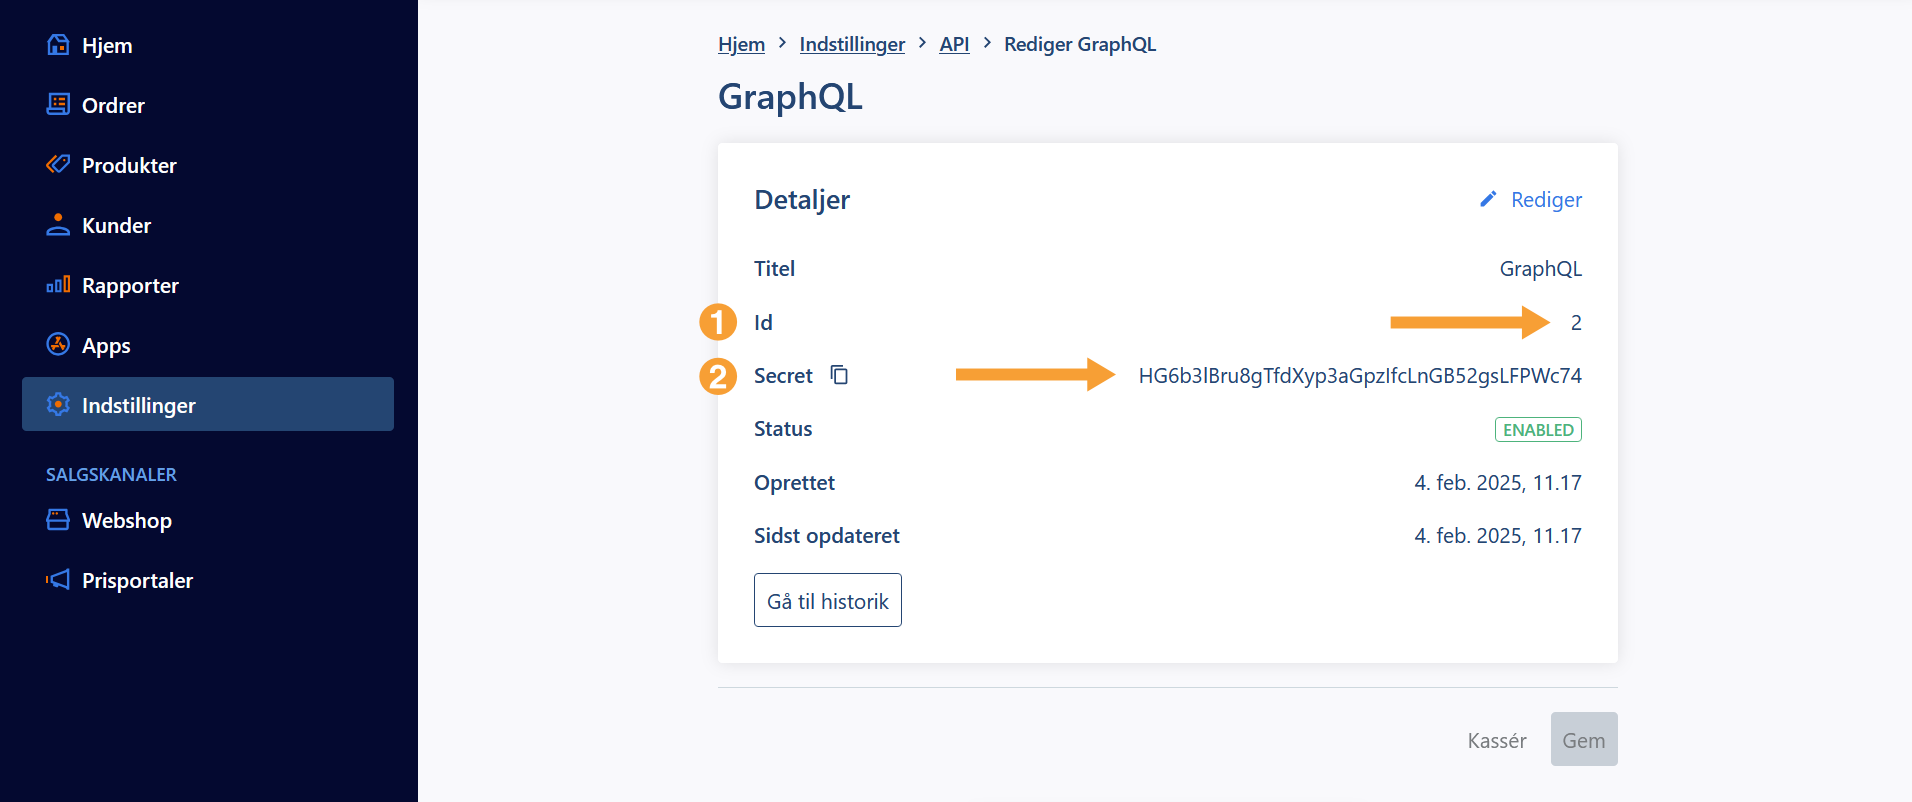
Here is an example of where to find the Client ID and Secret in the shop:
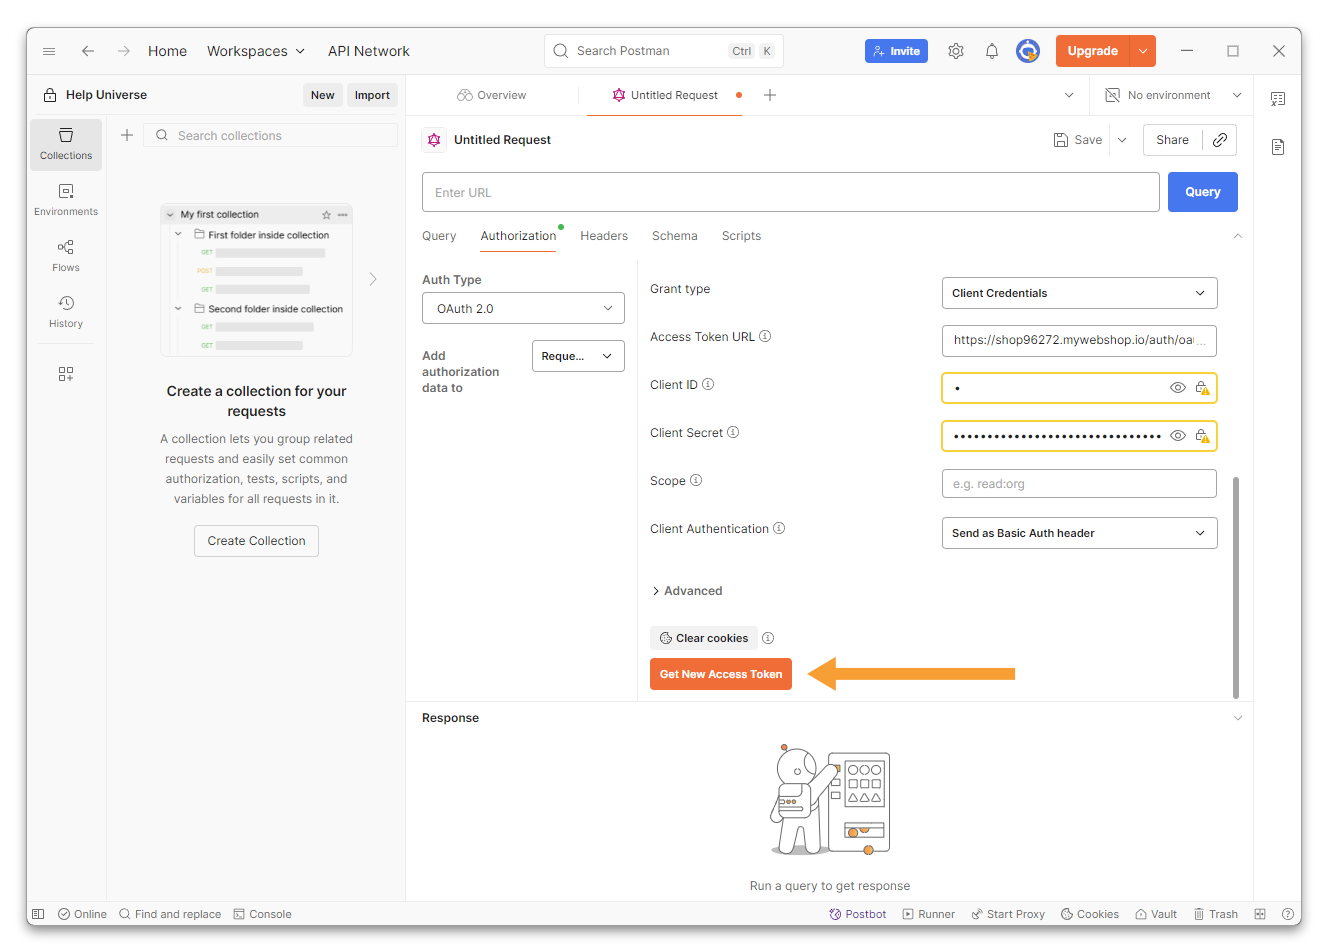
- Once you have filled in the relevant fields, scroll down the page and click Get New Access Token:
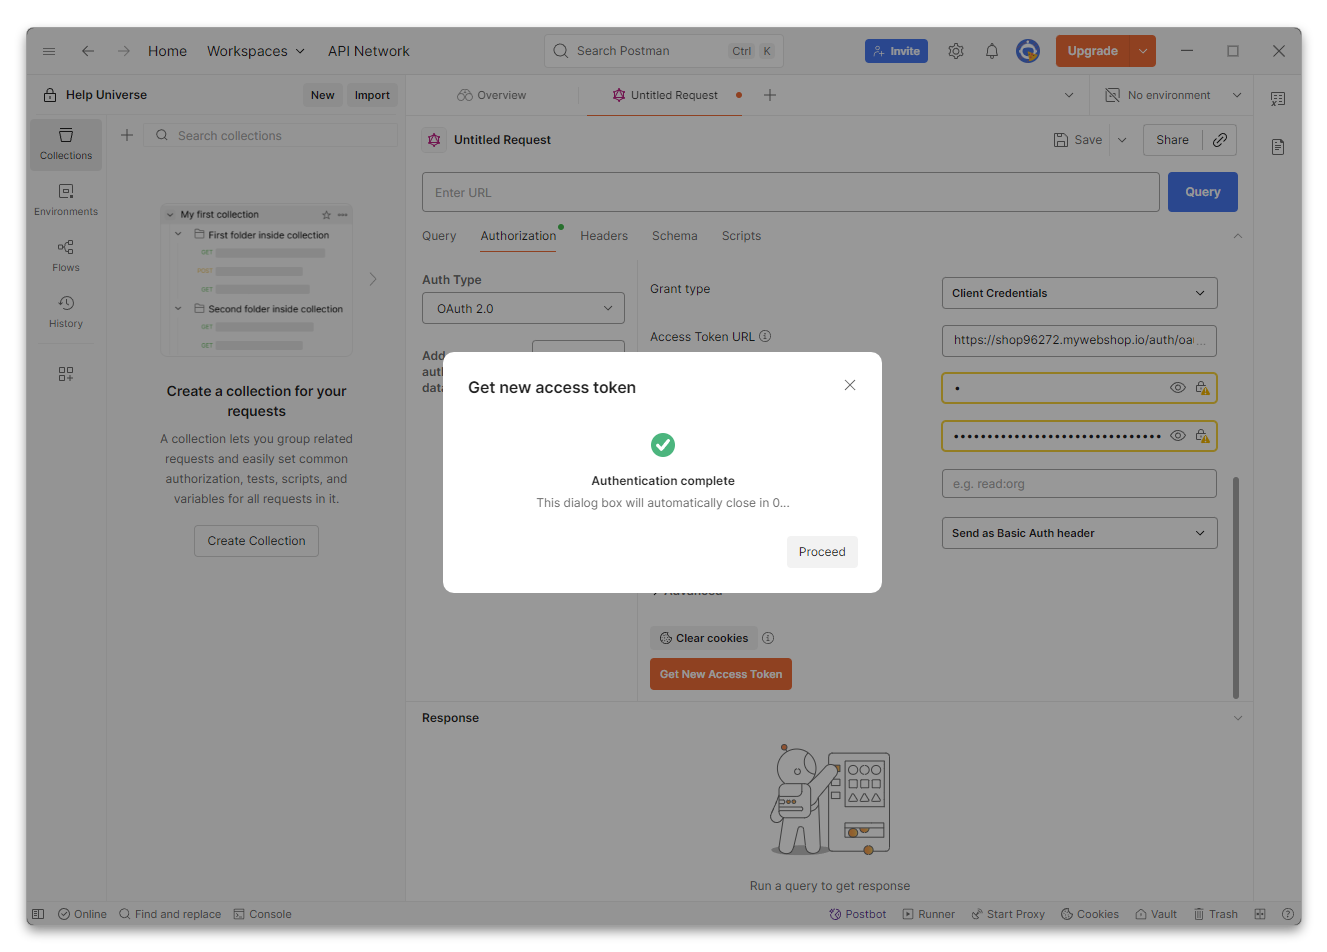
- If the information matches and the authorization link is correct, this dialog box will appear briefly:
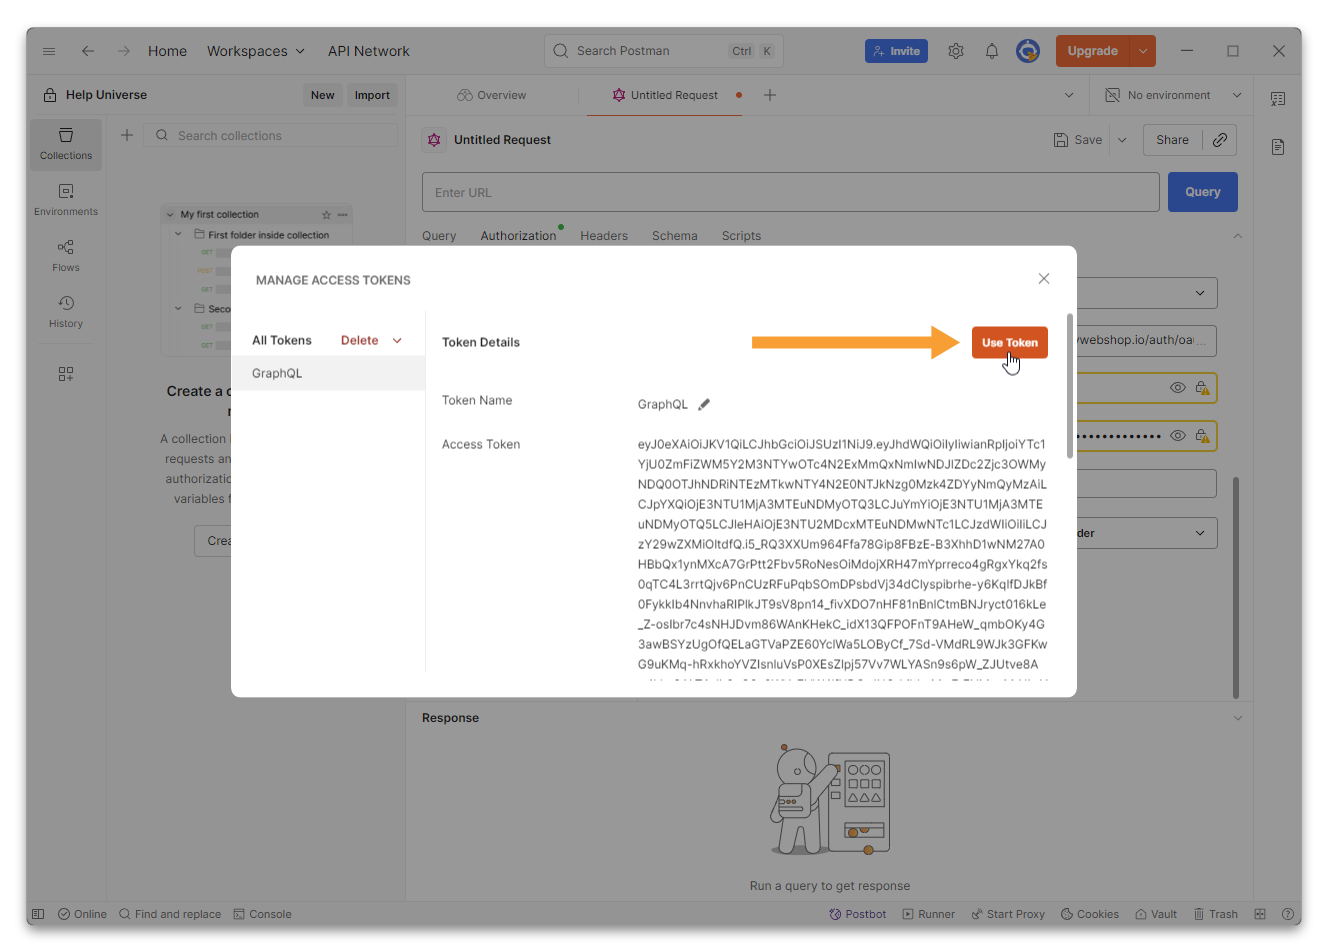
- The following dialog box will then open with your Access Token. Click the Use Token button to associate it with your current request in Postman:
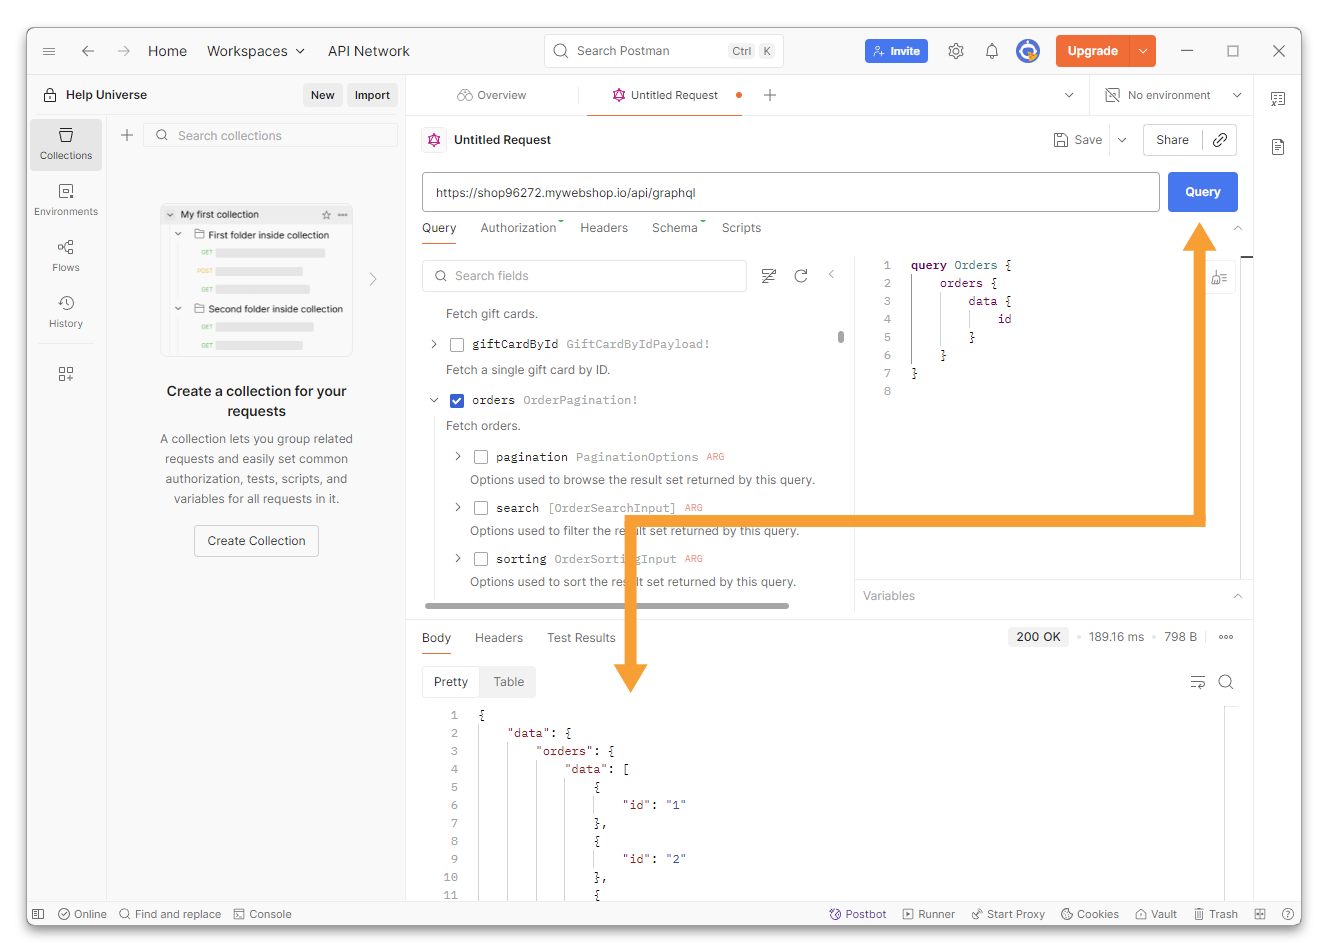
- Next, go to the Query tab and enter the shop's endpoint in the field at the top (see example earlier in this article). This will automatically publish the section below with the resources available to you via the entered endpoint:
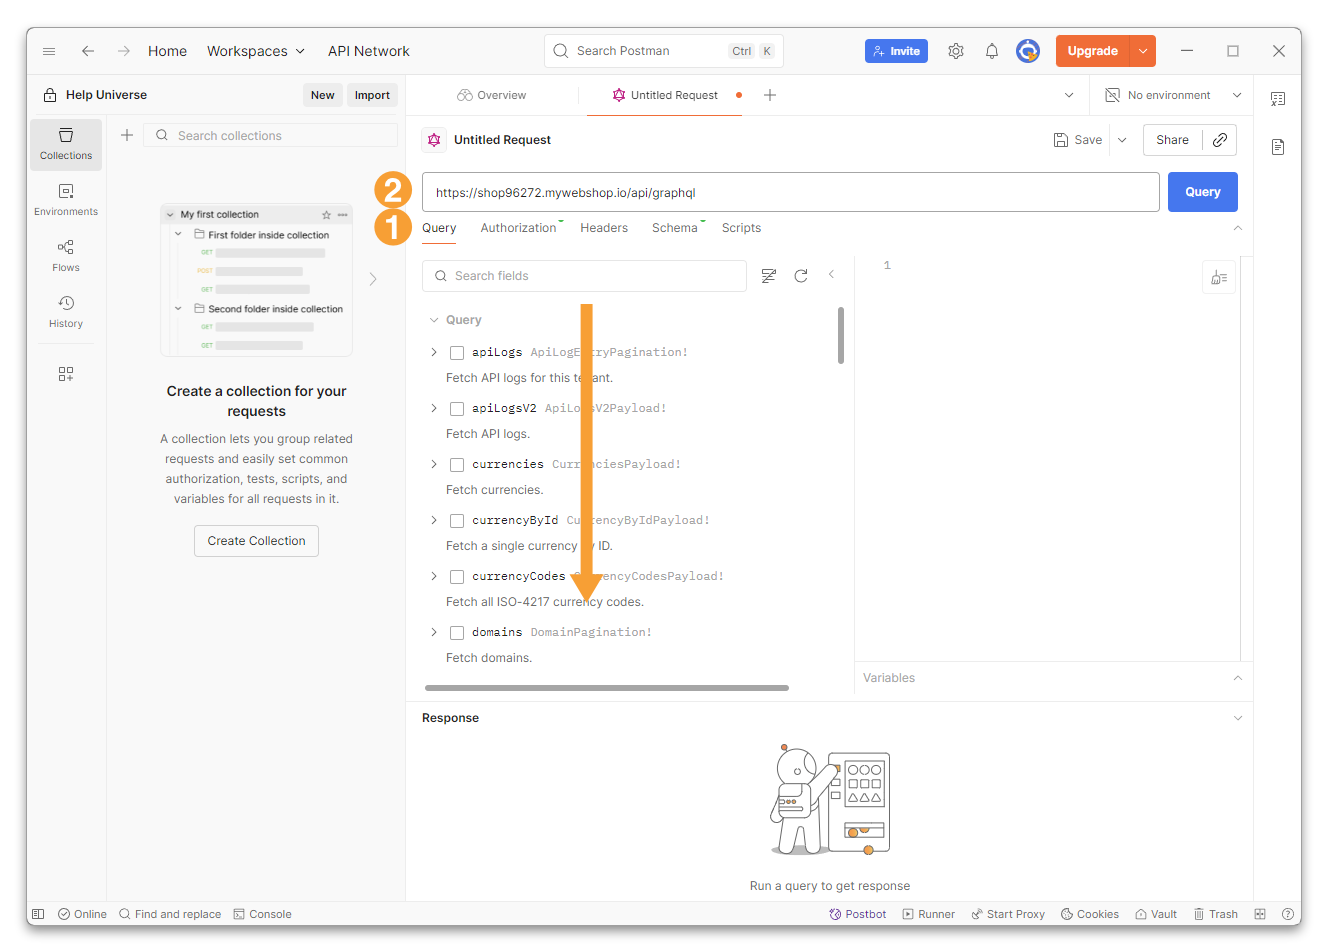
- Select one or more topics by checking the box and click Query to make a query to the API. The result will then be displayed in the section at the bottom of Postman:
Remember that you can use the Experimental endpoint to work with functionality that has not yet been published in the Public API. You can see examples of endpoints further up in the article.
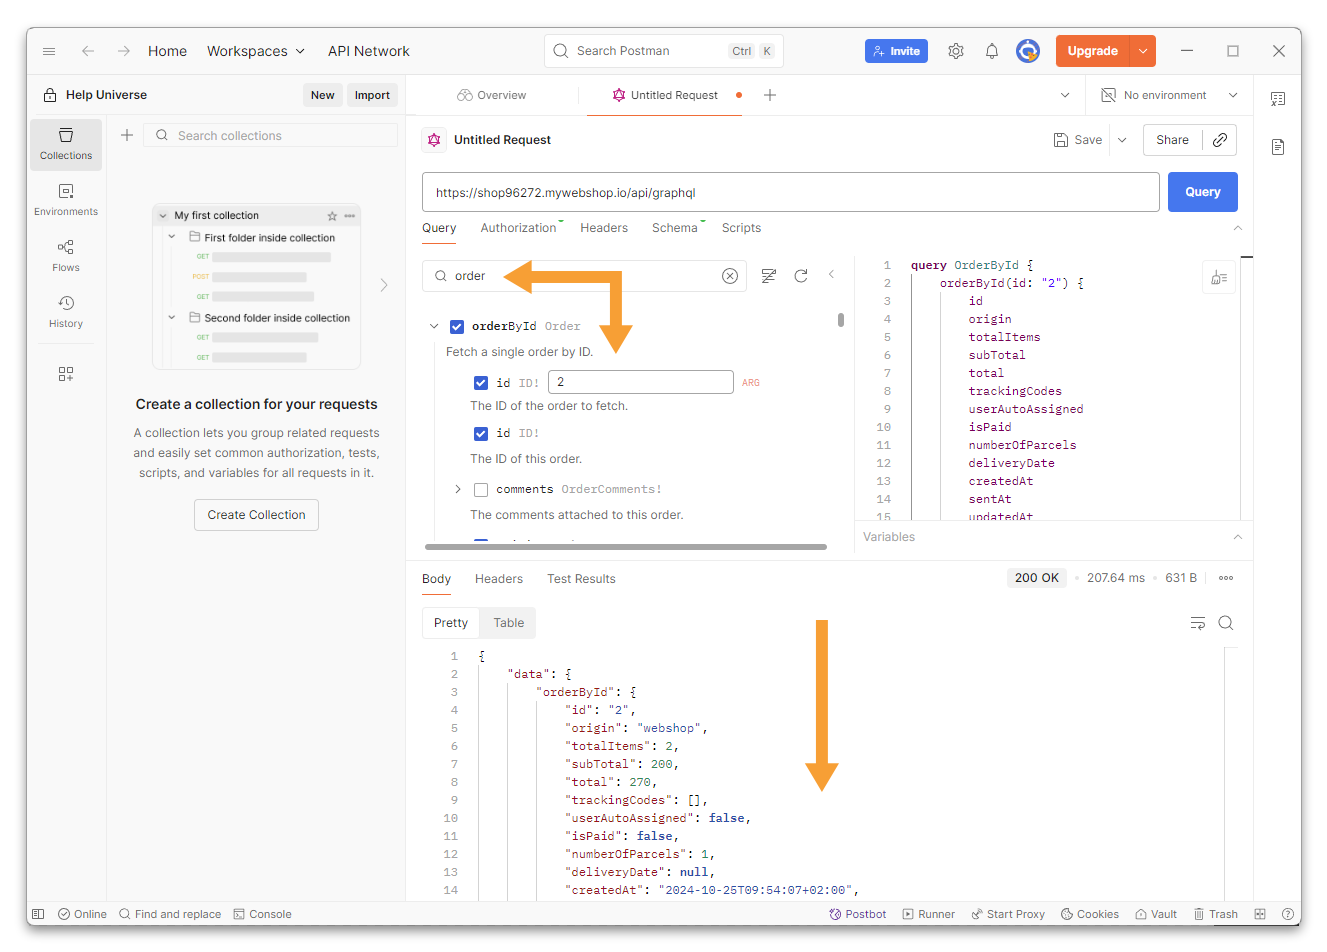
Retrieve order data via order ID
In this example, we have marked orderById by first searching for order. Since this is a query that expects an order ID, Postman allows us to enter the ID of the variable directly on the page. We then click on Query and get the relevant order in our response from the API:
In this example, the order does not exist, and we get null returned. We can see from the server's response code, which is 200, that our query has been completed:
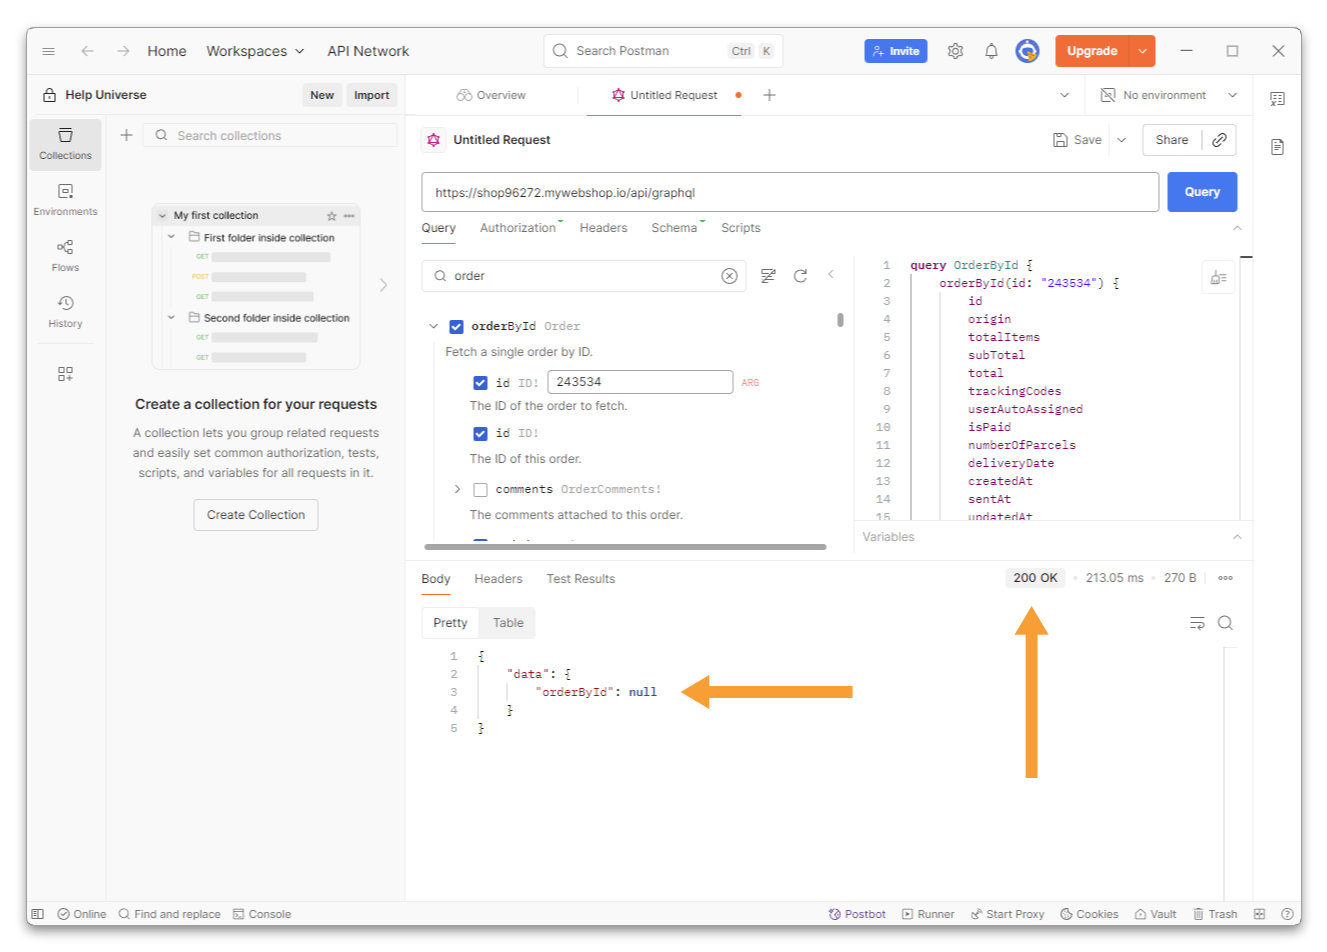
If you create your own integration for the shop's API, an example like this can give you insight into how your call should be formatted in your own code by studying what Postman sends to the API. You can also study the values you get back from the API.